

For an astrophotographer or an astronomer, this is nothing new or very difficult. But if you have never tried stellar photography, here is the first step. Photographing Sun Spots. To perform this, you don’t need any astronomy specific equipment. And if you are a photographer, all the equipment and software which is used must be in your knowledge and most like you must be owning them already.
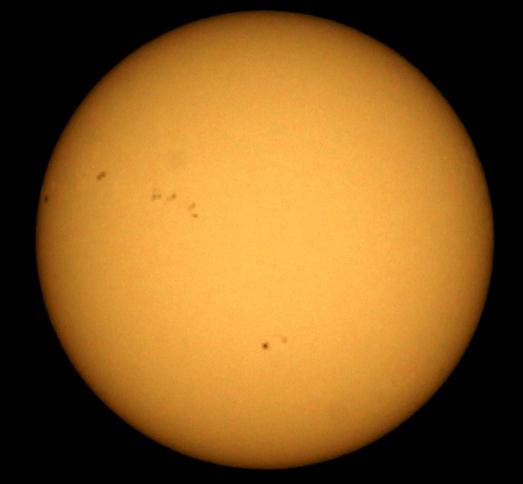
What are we going to achieve? Something like this:
To start with you will need the following stuff:
- A DSLR. I used Canon 550D for the same
- A lens with atleast 250mm Focal Length. Else the image will be so small that, it would be difficult to spot the Black Spots. The best will be a 1000mm where you can get the SUN filling the entire frame. But am not that rich to afford a 1000mm so used a Tamron 75-300 lens at 300mm for the same. This lens will cost you around INR8000 in India
- A tripod. At 250 or 300 mm, it’s always good to use a tripod
- NDx400 Filter. This is an insanely coated filter by Hoya. This is mostly used to skip moving objects from a landscape, by taking high exposure shots. But works great for solar photography aswell. You can buy one easily in India for around INR-2000. I got one from the Canon Showroom at GIP Noida for INR2100
- Photoshop or any other image manipulation software which can do some gamma and colour correction.
And that’s all. Install the camera with the lens on a tripod and attach the NDx400 filter on to of the filter. And point to the sun. now go to manual mode and try a few shots at ISO 100 and exposure time varying from 1/4000 to 1/1000 seconds at the highest f/ factor
Depending on the time of the day and the weather you will get a few images like this
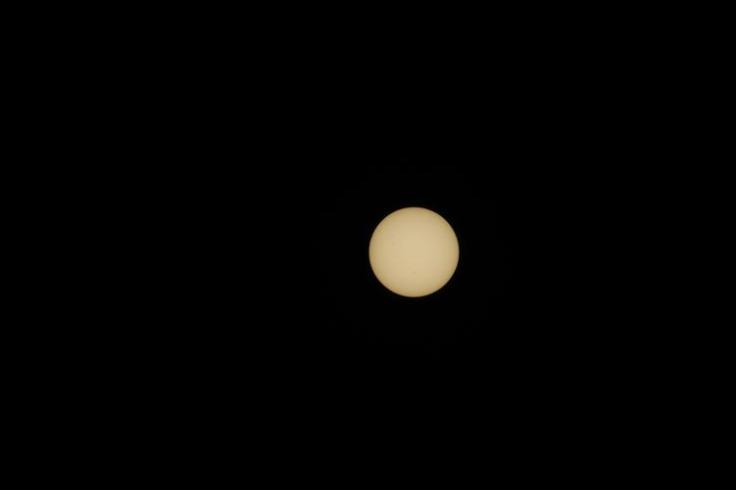
Image 1 — Details: Aperture: f/36, ISO: 100, Exp: 1/2000, FL: 300mm

Image 2 — Details: Aperture: f/36, ISO: 100, Exp: 1/4000, FL: 300mm
Now, take the best shot (determine by how crisp is the contsrats between Sun’s colour and the black spots) and take it to an image manipulation software. Now corp and do some Gamma correction to get the best Contrast image like this
I did it in photoshop like this:

Step 1: Crop and go to Images –> Adjustment – Exposers

Step 2: Play a bit with Gamma Correction and Exposer to get the best contrast.
Now comes the verification: Now the questions is, how to you check if the black spots on the sun are dirt on your camera sensor or actual sun spots 🙂 .
Goto http://sohowww.nascom.nasa.gov/data/realtime/hmi_igr/512/
This links tells shows you the most recent image of SUN in HD taken by the NASA’s SOHO Satellite. Find below an image taken by me and the image from SOHO take on the same day
The Final Output

Left: Image taken by me.. Right: Image from SOHO

very interesting even for a non enthusiast like me…nice nice
Thanks Shikhar 🙂
Cool Info tx for the share 🙂